
DIY The Perfect LBD?
Monday, January 31, 2011
The search for the perfect little black dress has been a long and arduous one. I must have about 10 black dresses in my wardrobe (I was banned from buying them for a while there) but none of them are that perfect dress that works in any situation and will take you from work to a party to a dinner to your divorce court proceedings with ease. I decided it was high time I got one made in the shape, style and fabric I wanted. Having obviously done a lot of hands on research on the subject of black dresses, it wasn't hard to come up with this one. It has really nice paneling on the front and a lovely cinched in waist. Will probably wear it with sheer spotted or opaque tights for work. It's such a lovely shape I'll probably get it made in a few other colours and a longer version too.
 Wearing: dress designed by me, reiss mesh heels.
Thrifted Yellow Shoes
Sunday, January 30, 2011
Love these cute yellow flats I found at my favourite thrift market on the weekend. For $30 honky. That's about £2.50. Very happy. They are actually Elle magazine brand, umm did they ever even make clothes.


DIY Christopher Kane Inspired Tassel Earrings
Saturday, January 29, 2011
Continuing the theme on from my recent Jil Sander inspired DIY maxi, I have been feeling very bright and neon recently. It probably helps that Hong Kong winter is pretty damn pleasant compared to London. I absolutely loved the Christopher Kane Spring Summer 11 collection and wanted to make something inspired by the brights. Neon accessories are particularly good if you want to get amongst the brights trend but dont want to go large on a dress or trousers. Found these tassels in a market and was instantly inspired. Bought some little earring studs and tied the tassels on. I can separate them in the future and just wear one colour, very versatile!


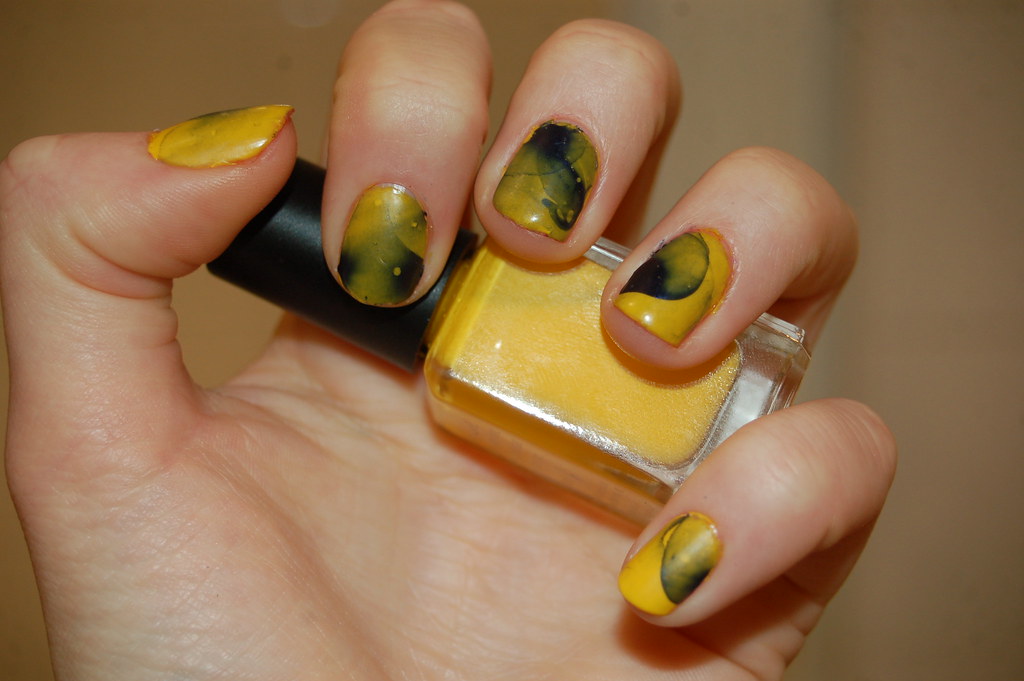
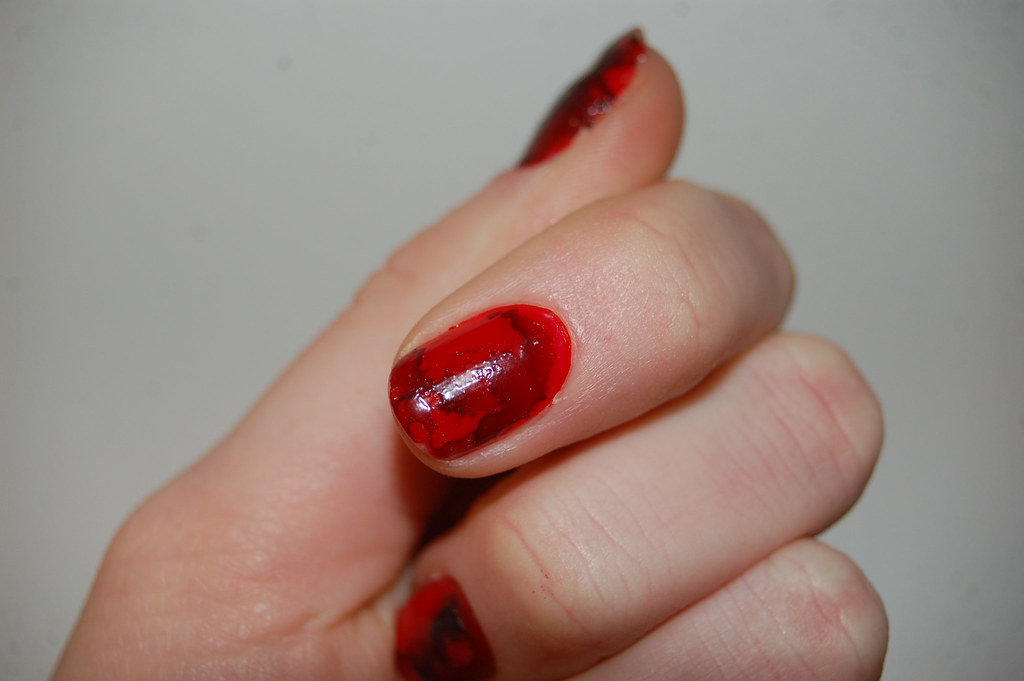
Guest DIY Post: Topshop SS11 Inspired Nails by MJ of Dreaming Spires and Old Car Tyres
My gorgeous friend MJ of Dreaming Spires and Old Car Tyres has done a tutorial of her tie-dye nails inspired by the Topshop SS11 collection. I saw them on her blog a while ago and just had to know how she did then. MJ jas been doing a number of nail DIYs inspired by SS11 collections. Aren't these ones perfect and oh so 70's? She's done a fantastic video tutorial for you all, showing a very interesting water marbling technique to get the tie dye effect. It looks like it takes a bit time and a whole lot of skill, and the technique has the most beautiful results. I know this is something I am going to have to practice a bit (or a lot!), and can't wait to try. And MJ has the cutest accent too. Scroll down for the video tutorial. I hope you'll also head of the MJ's blog and check out all her other fantastic DIYs!


DIY Safety Pin Collar
Thursday, January 27, 2011
Was looking for a safety pin project (as I bought about a million last week). This image taken by my lovely friend Jill of London Street Style has completely inspired me. Go check out Jill's blog for gorgeous pics of blogger friends from London (miss you guys) and her hilarious sense of humour. Safety pin DIY to come soon I promise.


DIY Postcard Wall
Wednesday, January 26, 2011
Collected postcards from my travels. A nice way to wake up. Looking forward to adding more from asia this year.

DIY Skeleton Back Top
Tuesday, January 25, 2011
Do you love this skeletop back top DIYed by the blogger of Cruel Thing? Her blog is bursting with amazing fashion and some very inspiring DIYs. Will definitely be giving this top a go!


DIY with Vanessa Jackman
I have to apologise in advance for the narcissism. It feels like aggggges ago that I had the pleasure of running into the beautiful and talented photographer Vanessa Jackman at LFW last year. She needs no introduction, I'm sure you've all spent as much time as I have pouring over her amazing streetstyle shots. I was running up and down the stairs in Somerset House when she approached me and asked if she could take my picture, we ended up having a long laugh and chat out the back of the Topshop Newgen exhibition. Obviously we worked out pretty quickly that we were both from Brisbane in Australia, and really the rest was history. She even managed to make me look half normal so for that at least she deserves a medal! Looking forward to running into her some time soon. Check out the rest of the pics she took here.
 Wearing: DIY shorts (here for the tutorial), vintage dior men's sheer white shirt, alexander mcqueen leather bustier, vintage beaded jacket (a fiver in north london - one of my most treasured finds), Zara wedge boots, vintage envelope clutch (£2 in east london), pendant from paris.
Wardrobe Rehab - Stocking up on basics and essentials
Monday, January 24, 2011
I love how many of you have been inspired to rehab your wardrobe. Check out my six steps to wardrobe bliss in the right hand column if wardrobe rehab is new to you. Remember my post about basics and essentials and how important they are as the foundations of your wardrobe? Well I did an epic trip with a girlfriend up to Shenzen on the weekend, a Chinese border town known for its amazing shopping, and thought it a perfect opportunity to tick off a few things on my list of basics and essentials that I need. Here's a sneak peak at the inspiration for my purchases.


What would you do if you didn't have to work?
Sunday, January 23, 2011
Because I would shop for fabric allll day long. Seriously. These are a few shots of the Western Markets near my house that have a whole top floor of fabric sellers. Anything you want you can get for nothing. Just remember to bargain ruthlessly.


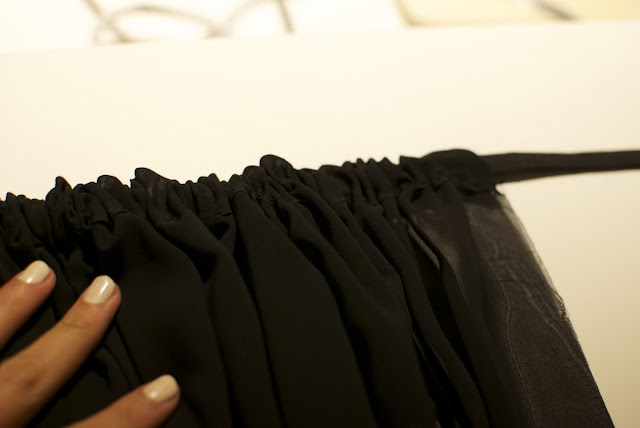
DIY Weekly - Sheer Black Maxi Skirt
I recently did a second DIY using the simple maxi tutorial I used for the Jil Sander one here. I used a sheer black fabric to make this one and it turned out really nicely. You can't see how transparent it is in the photos below, but work it with a bodysuit (if you dare) or a bodycon mini skirt or lace trimmed mini shorts underneath. Alternately you can belt a slouchy knit over the top.


3. Measure and cut the elastic to fit your waist.
4. Push the elastic through the waistband that has been made in the skirt, gathering and creating the pleat as you go. I attached the end of the elastic to a long bobby pin and used that to push it through.
5. Once all the fabric has been gathered onto the elastic, sew the elastic together to create the waistband. You can see I temporarily pinned the elastic with a safety pin before sewing it as that made it easier.
6. Sew the tube of fabric together down the short edge which will be sitting like a split all the way up the skirt.
7. Finally, hem the skirt.


Here's how to make your own. You need 2m of sheer fabric, 2cm wide elastic and a needle and thread.
1. Iron and pin down the edge of one of the long sides, this is where the elastic waist band will go.
2. Sew along this edge about 3cm back from the fold (I hand sewed but you can def use a machine if you have one)3. Measure and cut the elastic to fit your waist.
4. Push the elastic through the waistband that has been made in the skirt, gathering and creating the pleat as you go. I attached the end of the elastic to a long bobby pin and used that to push it through.
5. Once all the fabric has been gathered onto the elastic, sew the elastic together to create the waistband. You can see I temporarily pinned the elastic with a safety pin before sewing it as that made it easier.
6. Sew the tube of fabric together down the short edge which will be sitting like a split all the way up the skirt.
7. Finally, hem the skirt.


Wardobe Rehab - The One With All The Blogshops
Saturday, January 22, 2011
To tell you the truth I think that rehabbing your wardrobe is something that should be done every 3 or 6 months, as its inevitable that we collect things along the way that need to be culled and organised. I have been pretty minimalist about my shopping since I did the Six Steps, which has been really good - I really held back when I was travelling and since I have moved to HK, wanting to only invest in high quality pieces that will go with the rest of my wardrobe. Have been trying to live out the Dead Fleurette vibe with my clothes buying. If you often have trouble getting dressed in the morning even though you have heaps of clothes, you probably need to rehab. Start from step one (look in the right hand column for the steps) and within a few weeks you'll have a beautiful and organised wardrobe!
Heaps of my favourite bloggers have done their own version of wardrobe rehab recently, from which offerings on their blog shops are a devastating blow to my minimalist 'buy less' pledge, and very counterproductive. But what the hey. If you wanna get amongst all your favourite blogger's old stuff, read on.
Shannon from Dirty Hair Halo has also done an amazing job following my wardrobe rehab steps (so happy to have inspired her!). Check her blogshop out here yo.
Check Annabel of Blushing Ambition's blogshop here if you haven't already.
The lovely Jen of Style Crusader has also done a serious overhaul of her wardrobe - I loved her recent 'Closet Confessions' post where she quantified all her clothes, loved the pile of 38 jumpers among other things haha. Go here to see here shop. There's even 20% off until tomorrow afternoon!
Also, the very stylish Megan of Another Day to Dress Up has stocked her Etsy shop with some of her favourite things that were filling up her closet. Have been drooling over some of her offerings! Check her store out here.
If you guys know of any other great blogshops, leave me a comment. Share the love. x

DIY Folded Hem Leather Shorts
Friday, January 21, 2011
Found this tutorial on Fashion Nicotine for making leather shorts out of pants, I have made quite a few pairs in my time but I really like how she has folded the hem inside and then over so the right side of the leather shows on the outside. I have a tan suede pair of shorts that are going to get this treatment this weekend. Securing the hems with a few stitches at the sides will make sure they don't fall down.


Outfit Post: Thrifted Elephant Grey Leather Midi Skirt
Thursday, January 20, 2011
Am planning on heading to Shanghai over Easter where there are absolutely amazing markets with art deco and mao antiques and heaps of vintage clothes. I'll be sure to post my finds when I get back.
Wearing: vintage elephant grey midi skirt from Cat Street Markets, country road black singlet top, thrifted mustard top (two quid in east london), zara satchel, mango bootines.
DIY Rainbow Nails
Wednesday, January 19, 2011
I. Love. This. Both MJ of Dreaming Spires and Old Car Tyres and Shini of Park & Cube (snapped by the lovely Jen of The Style Crusader) have added a POP! of colour to their still-winter outfits by painting themselves some rainbow nails.


DIY Lady Garden
Tuesday, January 18, 2011


DIY Love Heart Back Top
Monday, January 17, 2011
Lovely to come across these two love heart back DIYs. So easy to do, simply cut a love heart shape out of the back of a top and then hem it - adding some beads along the way or ribbon. How cute! Both Paulinemma and Hannaliis have done amazing jobs! (If you haven't checked out their blogs I would do so quick smart).This DIY is definitely on my list.


Guest DIY Post: Love Aesthetics Two Tone Platform Heels
Sunday, January 16, 2011
Last week I did a profile on the amazing Ivania of the blog Love Aesthetics, and I can imagine you all fell in love with her as much as I did. Well I am soooo excited to share with you a DIY guest post authored by none other than Ivania herself! In this post she shows us how to make an organsm-worthy pair of Jil Sander inspired two tone platform heels. These are definitely on the top of my list, I've seen the Anywho girls wearing shoes similar aswell. If you haven't checked out her blog I would head there quick smart, her style and DIYs are lust worthy. Take it away Ivania!
 I found these babies at a secondhand market. Their perfect shape struck me immediately and reminded me of a pair of recent pointy Jil Sander platform heels. Though their silver color in combination with their heel- and platform height made me doubt about the possibility for them to be part of a tasteful ensemble. Did they used to belong to a Spice Girl or a stripper? Yes the shiny silver had to go. Or at least half of it. These heels are made out of a synthetic kind of satin. Special fabric paint would probably work best on cotton, canvas, velvet or any other real fabric coated shoes. For Leather shoes there are special leather paints for sale at any shoe maker. But this cheap material almost feels like woven plastic, a permanent marker was perfect for the job. Permanent marker also works like a charm on faux leather.
How to:
Draw a line along the exact middle of the shoe with chalk. If you have a very steady grip draw along it immediately with the permanent marker. Else you can always stick a piece of tape along the line to avoid making mistakes. Then fill in all the color, remove the tape and Voila! Two tone heels.
I don’t care to which 1995-stripper, -Spice Girl impersonator or drag queen they used to belong, with this 15 minute alteration they were even good enough to wear to last year’s Amsterdam fashion week!


DIY Weekly - Jil Sander Inspired Bright Pink Maxi Skirt
Friday, January 14, 2011
I have been TOTALLY lusting over the pink Jil Sander skirt (and really her whole Spring 11 collection) for a while now. As I obv can't afford to buy any of it, I made my own. I love the pop of bright colour, I know it sounds corny but it really makes you feel good to wear it. The fabric I used was a pink matte silk, so beautiful and flowy, it makes you want to swish around all day. I love how Jil Sander paired the brights with a crisp white tee. Definitely relaxed BBQ appropriate. The construction of the skirt is so incredibly basic, most of you will probably have made a skirt this way before and could do it again in your sleep. I used a process very similar to the one I used here for a black sheer maxi. Easy! See below for an overview of the steps. I'll be pairing this skirt tonight with my black vintage beaded jacket and gladiator flats. Can't wait! I'll post an outfit shot when I get a chance.


 Here's how to make your own:
You need: 2m of fabric of maxi width (I used silk but you can use a cheaper fabric as long as it has a pretty drape), 2cm wide elastic for the waist, coloured thread matching the fabric, a needle, an iron.
1. Iron and pin down the edge of one of the long sides, this is where the elastic waist band will go.
2. Sew along this edge about 3cm back from the fold (I hand sewed but you can def use a machine if you have one)
3. Measure and cut the elastic to fit your waist.
4. Push the elastic through the waistband that has been made in the skirt, gathering and creating the pleat as you go.
5. Once all the fabric has been gathered onto the elastic, sew the elastic together to create the waistband.
6. Sew the tube of fabric together down the short edge which will be sitting like a split all the way up the skirt. I actually used hook and eyes to connect this edge, as this allows me to detach the edges and tie a knot or drape it into a midi/mini easily.
7. Finally, hem the skirt (I am yet to do this!)
The best thing about this skirt is that you can wear it as a maxi, tie it up into a midi or even do some draping and make it a mini. So versatile! I think I'm going to make another one in a canary/buttery yellow too. The trick is to use nice fabric - I'm pretty lucky because fabrics in Hong Kong are unbelievably cheap, I got this silk for about $5.
Subscribe to:
Posts (Atom)


